|

Locations are presented in the order
they first appeared in the episodes, with all subsequent revisits to
that place grouped together for the sake of tidiness. Timings given are based on the Blu-ray editions and all episode images are sourced from these discs. Please note that Blu-ray grabs have been
regraded to highlight details of the filming locations
and are not representative of the actual look of the Blu-rays, which
are graded appropriately.
|

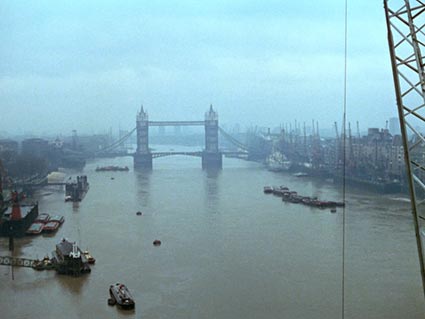
"Pargiter's Base of Operations"
(1A)
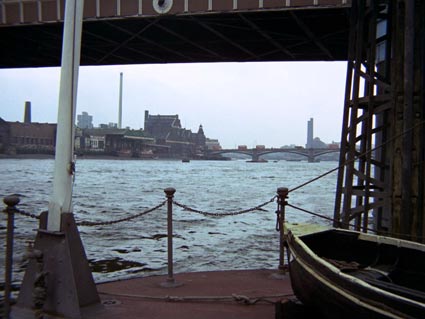
TOWER BRIDGE &
RIVER THAMES
(filmed from
BERMONDSEY WALL EAST
LONDON SE16)
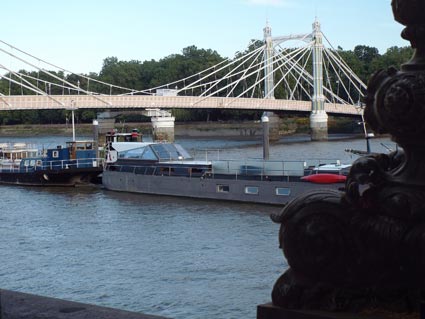
(00:02) Establishing shot
of the Thames and Tower Bridge.
|
The Tower of London also appeared in:
The Sentimental Agent -
Title Sequence
The Saint -
'Luella'
Man in a Suitcase -
'Variation on a Million Bucks' (Parts One and Two)
UFO - 'The Long Sleep'
The Protectors -
'Blockbuster'
The Adventurer -
'Mr Calloway is a Very Cautious Man'
Return of the Saint -
'The Obono Affair' and 'London Bridge is Falling Down'
Feature Films:
Frenzy (1972) |
|
THEN...
|
Image © ITV Studios, 1969 |
|
|
...NOW
|
Status:
Recognisable (Altered) |
Access: Public |
|
Image © Craig Robins, 2018 |
|
|
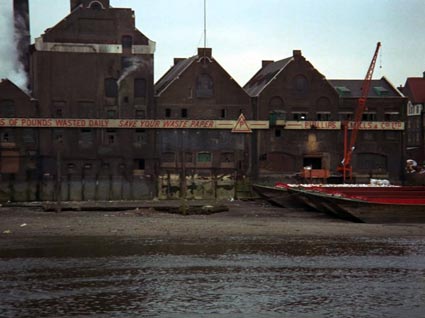
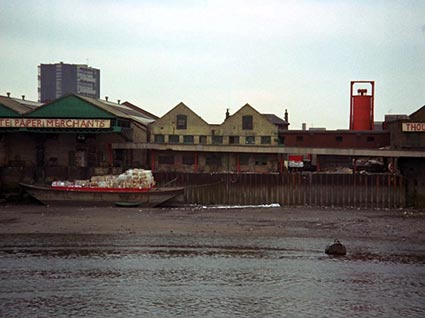
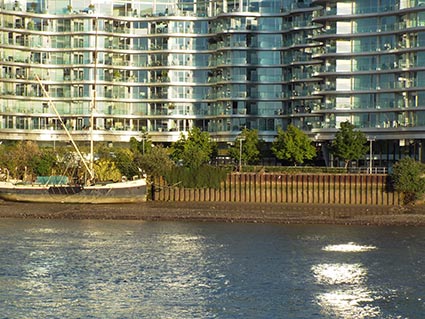
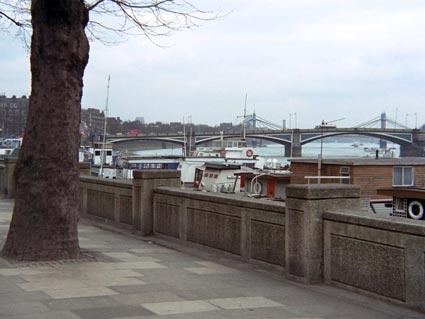
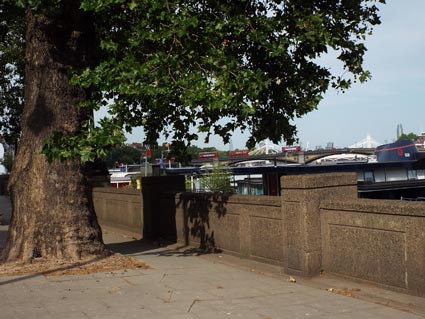
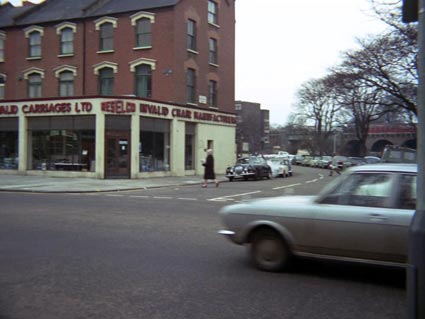
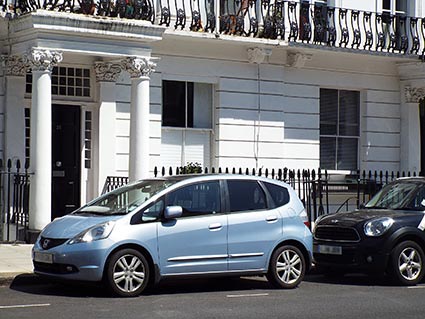
(1B)
BRIDGE WHARF
BATTERSEA
LONDON SW11
|
Identified by:
Geoff Dodd, May 2009 |
(00:06) The camera pans
left across the riverside wharves...
Spotter's Note: Our roving
photographer Craig Robins has very cleverly identified the exact
positions of the 'Then' shots of Bridge Wharf, which is
completely redeveloped, by noting distinguishing features on the
riverbank wall. The 'Now' photographs have been lined up with
reference to these tell-tale identifiers. |
THEN...
|
Image © ITV Studios, 1969 |
|
|
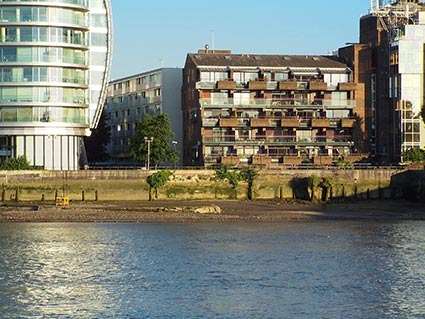
...NOW
|
Status:
Redeveloped |
Access: Public |
|
Image © Craig Robins, 2018 |
|
|
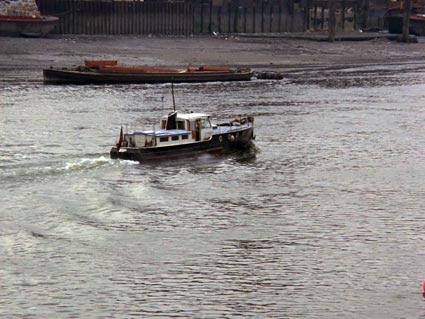
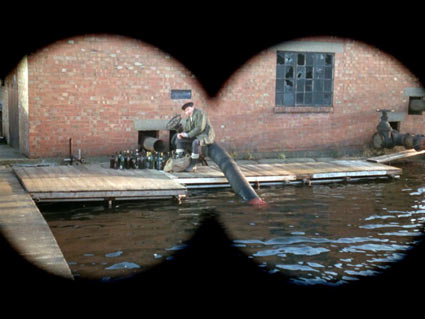
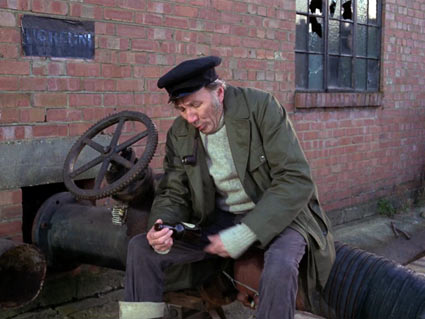
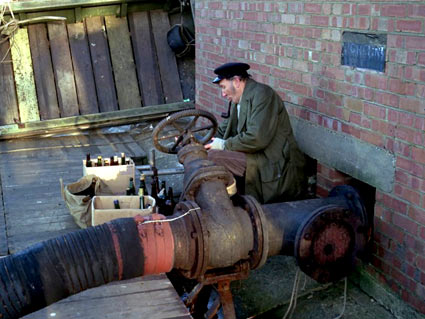
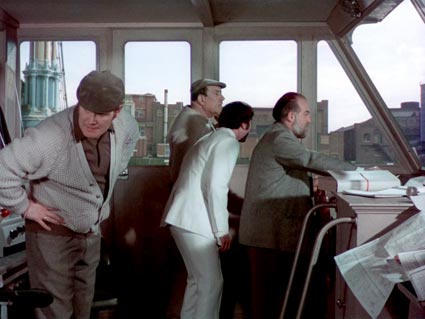
(00:12) ...before coming to
rest on a small wharf building, in which Pargiter and Lords
Dorking and Surrey run through a covert test of their
file-thieving equipment.
|
THEN...
|
Image © ITV Studios, 1969 |
|
|
...NOW
|
Status:
Redeveloped |
Access: Public |
|
Image © Craig Robins, 2018 |
|
|
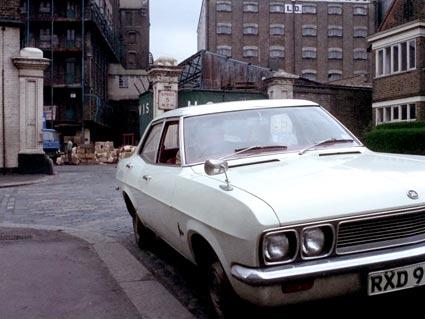
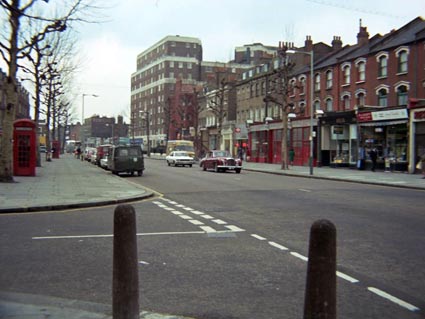
(1C)
SCENE DOCKS
ELSTREE STUDIOS
SHENLEY ROAD
BOREHAMWOOD
HERTFORDSHIRE WD6
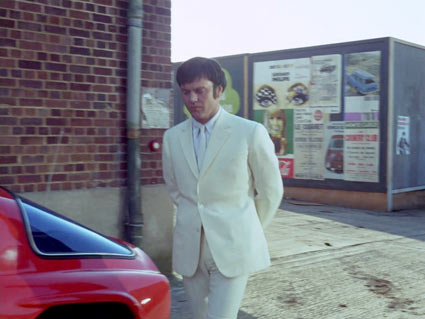
(24:58) Anne Soames drives
her orange sports car down the street behind Pargiter's
warehouse base and parks up outside the entrance (filmed from
outside Stage 5).
|
Also appeared in:
Used extensively in ITC productions and other television
and films produced at Elstree Studios. |
|
THEN...

|
Image © ITV Studios, 1969 |
|
|
|
THEN...
|
Image © ITV Studios, 1969 |
|
|
|
THEN...
|
Image © ITV Studios, 1969 |
|
|
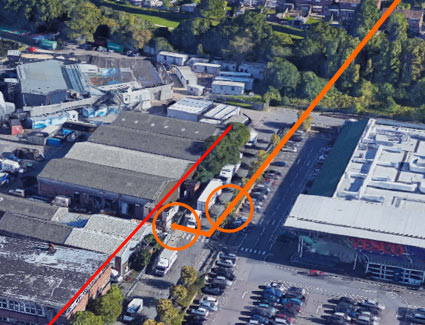
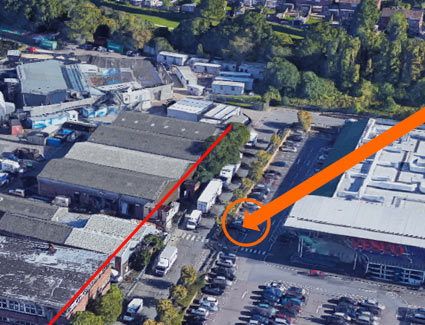
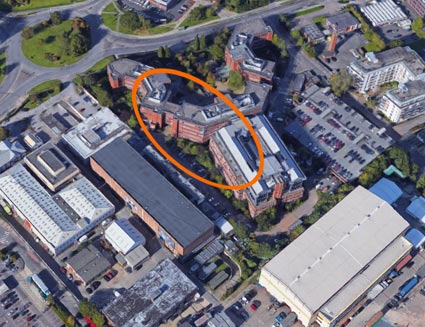
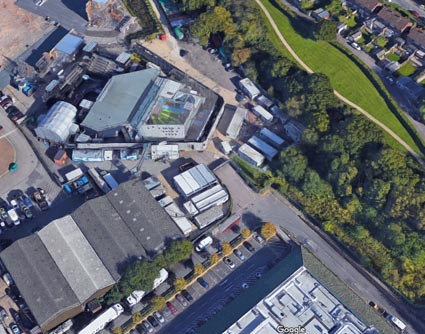
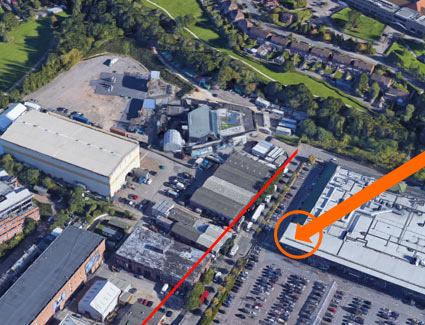
Spotter's Note: When a
large part of the Elstree Studios land was sold off to Tesco
plc, the Scene Docks and plasterers' building were shortened at
their south-western ends as they encroached into the land that
had been sold off. The red line in the aerial view demonstrates
the approximate 'cut line' through the studio buildings, with
everything to the right of the line being demolished. Stage 5
was demolished in its entirety. The orange arrow denotes the
approximate path of Anne Soames' car.
|
|
...NOW
|
Status:
Recognisable |
Access: Private |
|
Image / Map Data © Google, 2018 |
|
|
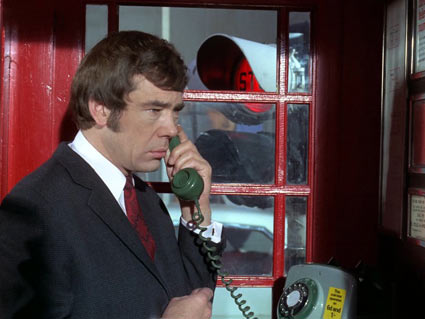
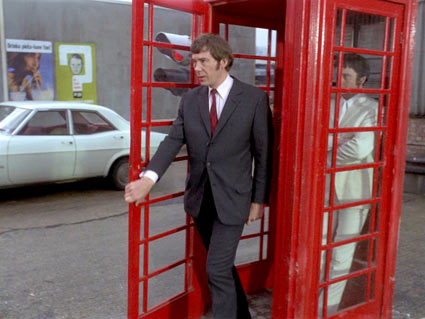
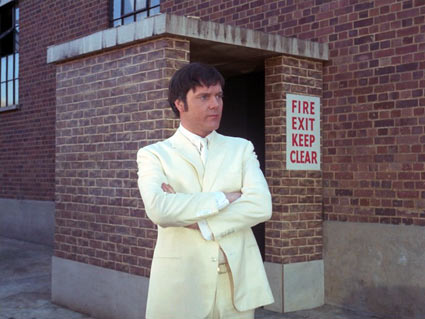
(33:16) Jeff makes a phone
call to the office. When he exits the box, and goes to enter the
warehouse opposite (call box and traffic lights located to the
south east of Stage 5).
|
THEN...
|
Image © ITV Studios, 1969 |
|
|
|
THEN...
|
Image © ITV Studios, 1969 |
|
|
|
THEN...
|
Image © ITV Studios, 1969 |
|
|
Spotter's Note: Once again,
the red line in the aerial view
demonstrates the approximate 'cut line' through the studio
buildings, with everything to the right of the line being
demolished to make way for the Tesco superstore. Stage 5 was demolished in its entirety. The orange
arrow denotes the approximate
filming site. The position of the telephone box would be
some way within the Tesco land today.
|
|
...NOW
|
Status:
Part
Redeveloped |
Access: Private |
|
Image / Map Data © Google, 2018 |
|
|
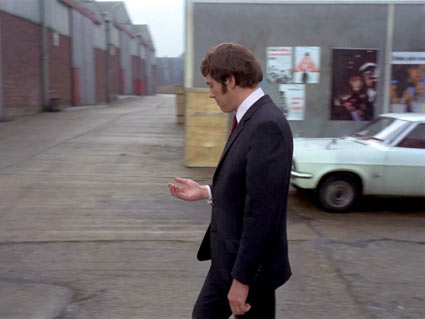
(37:01) Marty paces about,
worried about Jeff.
|
|
THEN...
|
Image © ITV Studios, 1969 |
|
|
THEN...
|
Image © ITV Studios, 1969 |
|
|
(39:20, 39:23) Marty concentrates
on smashing the glass of the fire alarm (the plasterers'
workshops are seen behind him).
(41:34) Jeff and Anne
Soames emerge from the burning building – Jeff avoids the
police. |
|
THEN...
|
Image © ITV Studios, 1969 |
|
|
Spotter's Note: Again, the red line in the aerial view
marks the approximate 'cut line' through the studio
buildings, with everything to the right of the line being
demolished. Stage 5 was demolished in its entirety. The orange
arrow denotes the approximate
filming site.
|
|
...NOW
|
Status:
Part
Redeveloped |
Access: Private |

|
Image / Map Data © Google, 2018 |
|
|
(1D)
BACKLOT
ELSTREE STUDIOS
SHENLEY ROAD
BOREHAMWOOD
HERTFORDSHIRE WD6
(39:27) The lamplight on a
nearby wall shatters.
|
|
THEN...

|
Image © ITV Studios, 1969 |
|
|
...NOW
|
Status:
Redeveloped |
Access: None |
|
|
(1E)
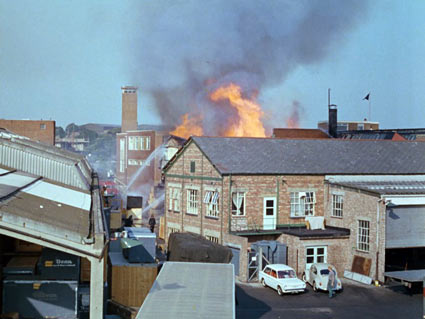
IMPERIAL STUDIOS
MAXWELL ROAD
BOREHAMWOOD
HERTFORDSHIRE WD6
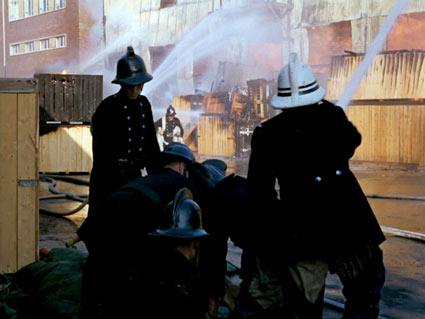
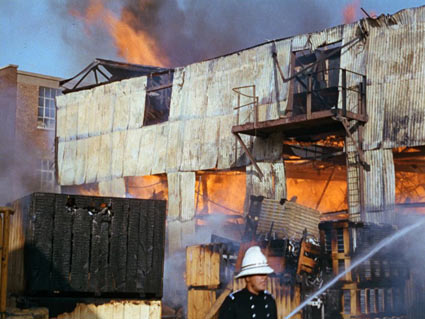
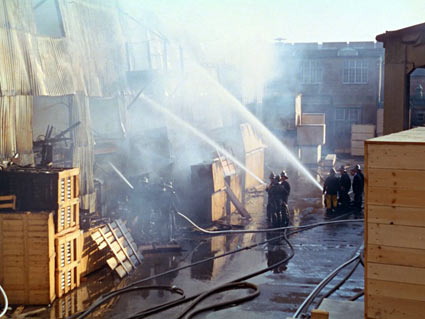
(40:25) Pargiter's
warehouse is consumed in flames. The Fire Brigade are in
attendance.
Spotter's Note: Monty
Berman filmed this footage when the fire broke out next door to
Elstree Studios, knowing it
could be used in future productions.
It is worth noting that this
incident took place at the Gate Recording Theatre, part of the
Imperial Studios complex, then situated
next to ABPC Elstree Studios, not the Gate Studios opposite
Elstree and Borehamwood railways station. This is now
redeveloped as Imperial Place and the fire area is now the car
park for the new building.
|
Also appeared in:
The Champions -
'Happening'. |
|
THEN...
|
Image © ITV Studios, 1969 |
|
|
THEN...
|
Image © ITV Studios, 1969 |
|
|
THEN...
|
Image © ITV Studios, 1969 |
|
|
THEN...
|
Image © ITV Studios, 1969 |
|
|
...NOW
|
Status:
Redeveloped |
Access: Private |
|
Image / Map Data © Google, 2018 |
|
|
|

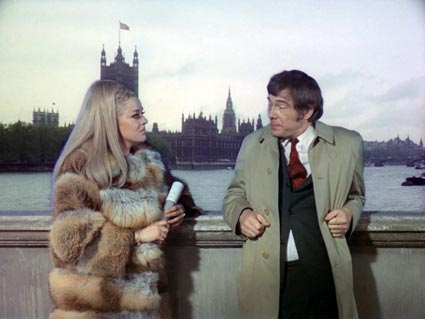
"The Environs of
Jeff and Marty's Office"
(2A)
PALACE OF WESTMINSTER
LONDON SW1A
(filmed from
ALBERT EMBANKMENT
LAMBETH
LONDON SE1)
(04:03) Establishing shot of
the Palace of Westminster.
Spotter's Note: This footage
was shot by camera operator Alan White and director Godrey Grayson for
Danziger Productions several years before Randall and Hopkirk
(Deceased)'s filming.
|
Also appeared in:
Randall and Hopkirk (Deceased) - 'But What a Sweet
Little Room', 'Could You Recognise the Man Again'
The Avengers - 'Death at Bargain Prices'
Danger Man - 'Whatever Happened to George
Foster?'
Man in a Suitcase - 'The Bridge'
The Saint - 'The Imprudent Politician' and 'Double
Take'
The Baron - 'So Dark the Night'
The Persuaders! - 'The Time and the Place' and
Opening Titles
The Adventurer - 'The Not So Merry Widow' |
|
THEN...
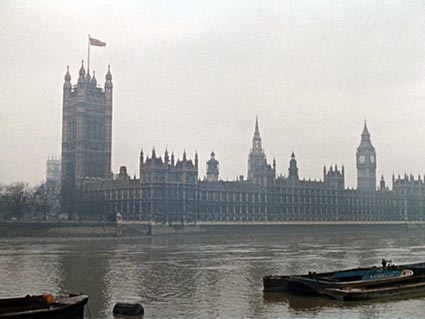
|
Image © ITV Studios, 1969 |
|
|
...NOW
|
Status:
Recognisable |
Access: Public |
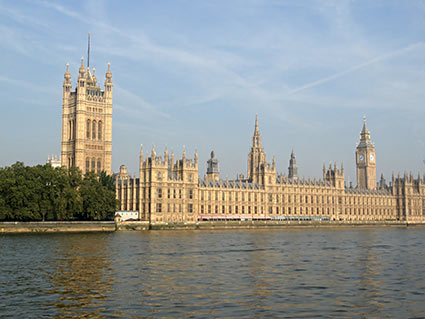
|
Image © Craig Robins, 2018 |
|
|
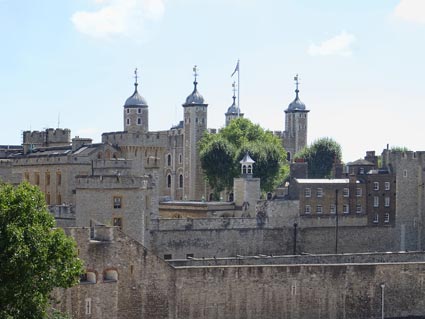
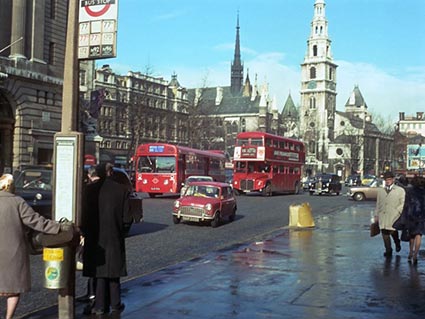
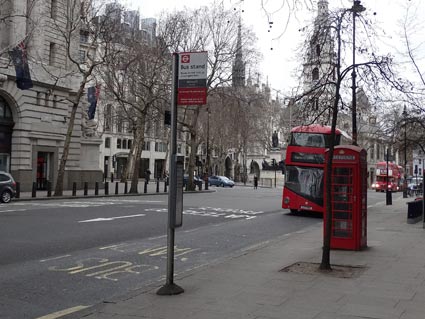
(2B)
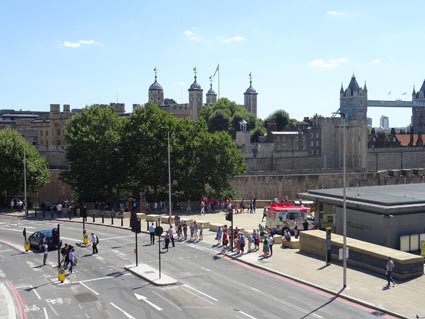
THE TOWER OF LONDON
ST. KATHARINE'S & WAPPING
LONDON EC3
(04:10) Establishing shot of
the Tower of London (filmed from the Tower's west side).
|
Also appeared in:
The Baron - 'The Killing'
Man in a Suitcase - 'The Whisper'
Department S - 'The Man Who Got a
New Face'
The Protectors - 'Talkdown'
The Persuaders! - 'The Time and the Place'
Return of the Saint - 'The Obono
Affair' |
|
THEN...
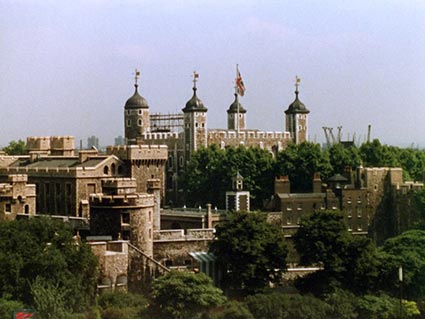
|
Image © ITV Studios, 1969 |
|
|
...NOW
|
Status:
Recognisable |
Access: Public |
|
Image © Craig Robins, 2018 |
|
|
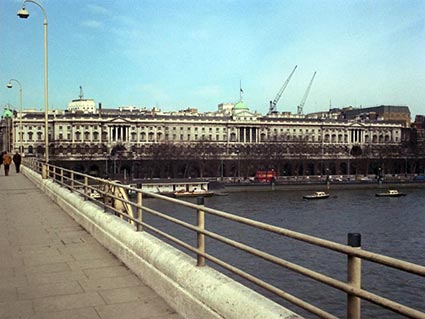
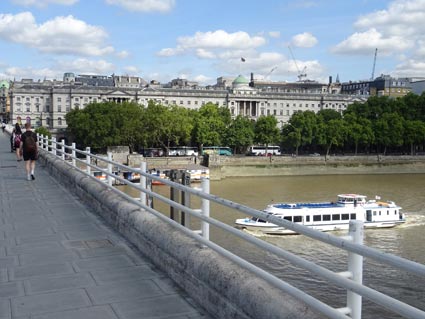
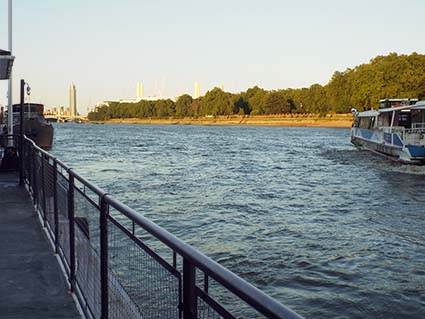
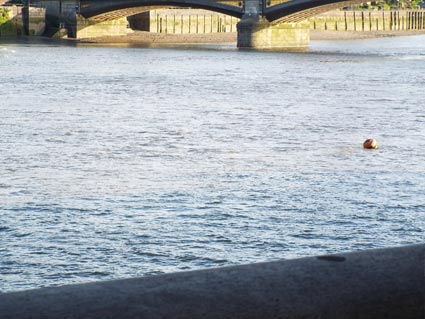
(08:05) Establishing shot of
Tower Bridge and the River Thames...
|
THEN...
|
Image © ITV Studios, 1969 |
|
|
...NOW
|
Status:
Recognisable |
Access: Public |

|
Image © Craig Robins, 2018 |
|
|
(08:10) The camera pans
across to the Tower of London, with Tower Bridge behind and to the right of
it (filmed from the Tower's west side).
|
THEN...
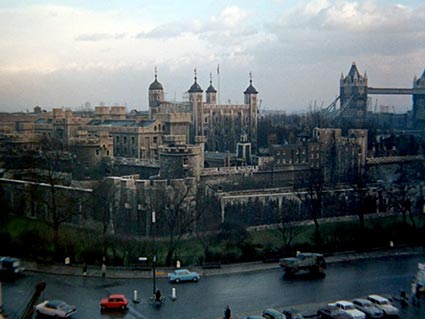
|
Image © ITV Studios, 1969 |
|
|
...NOW
|
Status:
Recognisable |
Access: Public |
|
Image © Craig Robins, 2018 |
|
|
(2C)
PICCADILLY CIRCUS
WESTMINSTER
LONDON W1
(04:13) Establishing shot of
Piccadilly Circus, beginning with a close up, zooming out to wider
view.
|
Also appeared in:
Randall and Hopkirk (Deceased) - 'Whoever Heard of
a Ghost Dying' and 'The Ghost Who Saved the Bank at Monte Carlo'
Also used extensively in other ITC and ABPC television
film series. |
|
THEN...
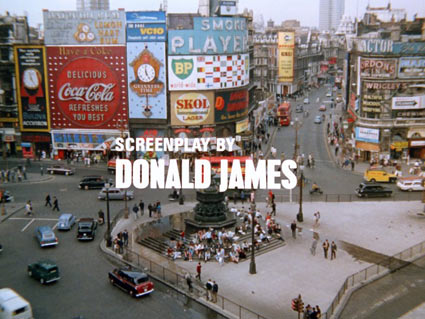
|
Image © ITV Studios, 1969 |
|
|
...NOW
|
Status:
Recognisable (Altered) |
Access: Public |
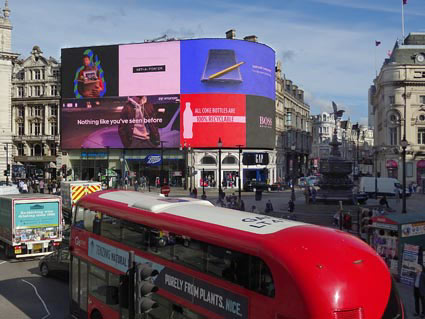
|
Image © Craig Robins, 2018 |
|
|
(2D)
OLD COMPTON STREET
SOHO
LONDON W1
|
Identified by:
Marishka von Saatz, 2002 |
(04:18) Establishing shot of a London street, supposedly
near where the Randall and Hopkirk agency is based.
|
Also appeared in:
Randall and Hopkirk (Deceased) - 'The Smile Behind
the Veil' and 'Could You Recognise the Man Again?'
H.G. Wells' Invisible Man - 'Blind Justice'
The Protectors - 'A Kind of Wild Justice' and
'Zeke's Blues' |
|
THEN...

|
Image © ITV Studios, 1969 |
|
|
...NOW
|
Status:
Recognisable |
Access: Public |
|
Image © Craig Robins, 2018 |
|
|
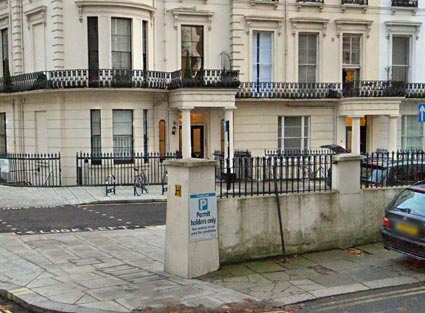
(2E)
ADAMS FURNITURE
SPRINGFIELD ROAD
HARROW
LONDON
HA1
|
Identified by:
Andy Hulse |
(04:26) Establishing shot of
the entrance to the Randall and Hopkirk office building, with the
camera zooming in to the sign by the entrance.
(32:07) A close-up of the
sign by the entrance to the Randall and Hopkirk offices
establishes the venue of the following scene.
|
Also appeared in:
Randall and Hopkirk (Deceased) - 'But What a Sweet
Little Room', 'For the Girl Who Has Everything', 'The Trouble With Women', 'Whoever Heard of a Ghost Dying', 'When the
Spirit Moves You', 'Never Trust a Ghost' and others |
Since Filming:
The Randall and Hopkirk offices are long gone, demolished in August 1985 to make way for a new development. The grass verge seen in the 1993 photograph represents the approximate point at which the
offices stood. This too has also now gone and Jeff and Marty's
offices are now under concrete, following the building in 1996 of
a new shopping centre.
|
THEN...
|
Image © ITV Studios, 1969 |
|
|
...1993...
|
Status: Demolished |
Access: None |

|
|
...NOW
|
Status: Demolished |
Access: None |
|
|
|

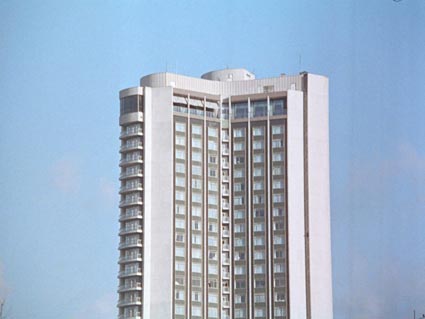
"The Hilton Hotel"
LONDON HILTON
(now London Hilton on Park
Lane)
(filmed from
Grosvenor Place)
22 PARK LANE
MAYFAIR
LONDON W1K
(06:01) The London Hilton
Hotel, the venue for the beauty contest at which Jeff and
Jeannie have been engaged to act as escorts for the
contestants. The camera
zip-zooms to the top floors of the Hilton building.
|
Also appeared in:
Randall and Hopkirk (Deceased) -
'A Sentimental Journey'
The Saint - 'The Lawless Lady'
The Champions - 'To Trap a Rat'
and 'Nutcracker'
Department S - 'The Trojan Tanker'
The
Adventurer - 'Full Fathom Five' |
|
THEN...
|
Image © ITV Studios, 1969 |
|
|
...NOW
|
Status:
Recognisable |
Access: Public |
|
Image © Craig Robins, 2018 |
|
|
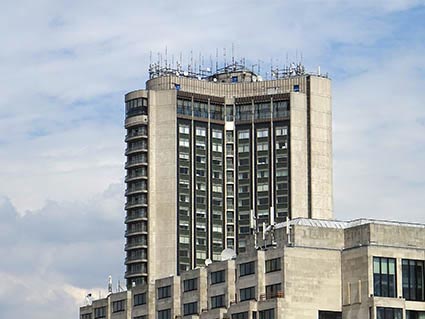
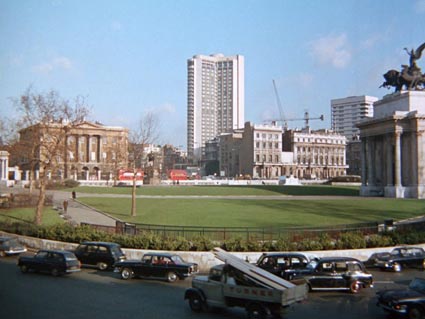
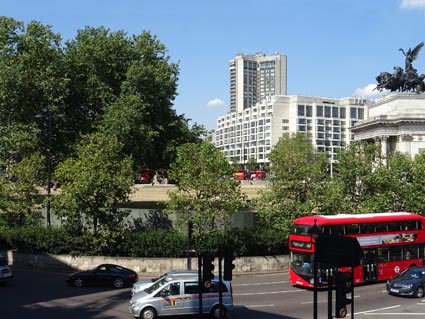
(22:44) Establishing shot
of the Hilton Hotel, showing traffic passing the Wellington
Arch.
(32:43) Establishing shot of the
Hilton Hotel, zooming out to a wide shot from a close-up
focusing on the the upper floors. |
THEN...
|
Image © ITV Studios, 1969 |
|
|
...NOW
|
Status:
Recognisable |
Access: Public |
|
Image © Craig Robins, 2018 |
|
|
|

"Visiting the
Public Records Office"
(4A)
THE STRAND
COVENT GARDEN
LONDON WC2
|
Identified by:
Stephen Carter, June 2001 |
(08:50) Jeannie drives Anne
Soames to the Public Records building.
|
Also appeared in:
Randall and Hopkirk (Deceased) -
'A Sentimental Journey'
Gideon's Way - 'Fall High, Fall Hard'
The Baron - 'The Edge of Fear'
Department S - 'A Small War of Nerves'
The Adventurer -
'Mr Calloway is a Very Cautious Man' |
|
THEN...
|
Image © ITV Studios, 1969 |
|
|
...NOW
|
Status:
Recognisable |
Access: Public (Houses Private) |
|
Image © Craig Robins, 2018 |
|
|
(4B)
WATERLOO BRIDGE & SOMERSET HOUSE
VICTORIA EMBANKMENT
LONDON WC2
(09:18) Establishing shot
of the riverside annexe of the Public Records Office, starting
with a view from Waterloo Bridge (looking east towards St Paul's
Cathedral)...
|
THEN...
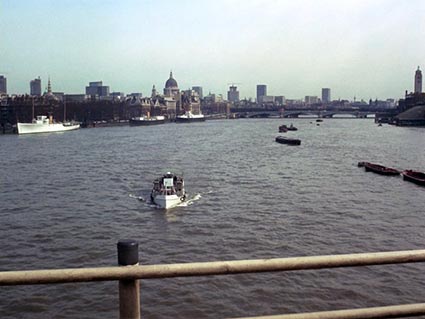
|
Image © ITV Studios, 1969 |
|
|
...NOW
|
Status:
Recognisable |
Access: Public |
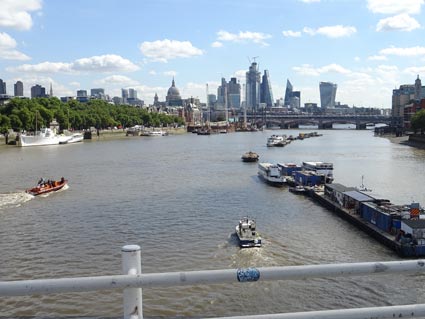
|
Image © Craig Robins, 2018 |
|
|
(09:22) ...and panning
around to Somerset House on the north bank of the Thames.
(10:34) Aboard his boat at
the pier, Pargiter studies the Somerset House annexe through his
binoculars. |
THEN...
|
Image © ITV Studios, 1969 |
|
|
...NOW
|
Status:
Recognisable |
Access: Public |
|
Image © Craig Robins, 2018 |
|
|
|

"Pargiter's Boat on
the River"
(5A)
CADOGAN PIER
CHELSEA EMBANKMENT
LONDON SW3
(10:08) Anne Soames, inside
the Public Records Annexe, spies Pargiter's boat moored at the
pier.
(11:05) Pargiter alights
from the boat and makes his way up the gangway to the
embankment.
(19:47) Dorking goes
to collect the stolen papers.
|
THEN...

|
Image © ITV Studios, 1969 |
|
|
...NOW
|
Status:
Recognisable |
Access: Public |
|
Image © Craig Robins, 2018 |
|
|
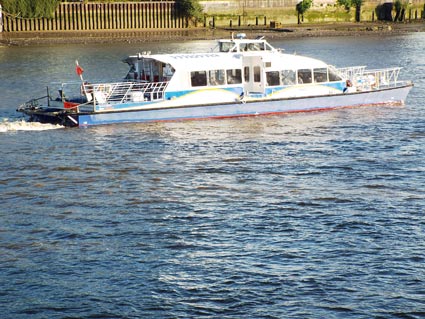
(11:17) Dorking and
Surrey sail off down the river.
(16:08) Pargiter's boat is
moored on the river.
|
THEN...
|
Image © ITV Studios, 1969 |
|
|
...NOW
|
Status:
Recognisable |
Access: Public |
|
Image © Craig Robins, 2018 |
|
|
(5B)
RIVER THAMES from
CADOGAN PIER
CHELSEA EMBANKMENT
LONDON SW3
(29:42) The camera cuts to
a shot of the Thames as Marty shows Jeff the recently repaired
hole in the wall of the records office.
|
THEN...
|
Image © ITV Studios, 1969 |
|
|
...NOW
|
Status:
Recognisable (Altered) |
Access: Public |
|
Image © Craig Robins, 2018 |
|
|
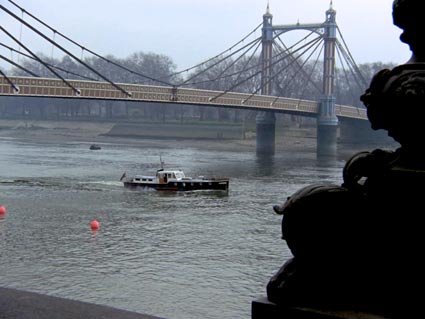
(5C)
RIVER THAMES and
ALBERT BRIDGE from
CHELSEA EMBANKMENT
LONDON SW3
(40:05) Pargiter's boat
heads off down the river.
|
THEN...
|
Image © ITV Studios, 1969 |
|
|
...NOW
|
Status:
Recognisable |
Access: Public |
|
Image © Craig Robins, 2018 |
|
|
(5D)
RIVER THAMES and
BATTERSEA BRIDGE from
CHELSEA EMBANKMENT
LONDON SW3
(40:18) Pargiter's boat
continues down the river, nearing Battersea Bridge.
|
THEN...
|
Image © ITV Studios, 1969 |
|
|
...NOW
|
Status:
Recognisable |
Access: Public |
|
Image © Craig Robins, 2018 |
|
|
(43:35) Marty catches sight
of Pargiter's boat by Battersea Bridge.
|
THEN...
|
Image © ITV Studios, 1969 |
|
|
...NOW
|
Status:
Recognisable |
Access: Public |
|
Image © Craig Robins, 2018 |
|
|
(5E)
RIVER THAMES from
VICTORIA EMBANKMENT
(A3211)
LONDON SW1
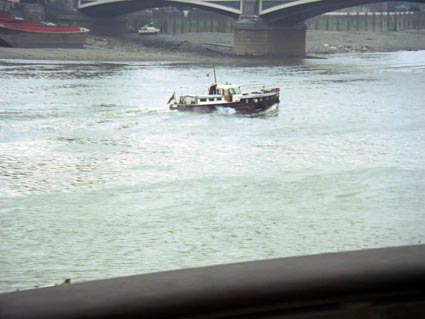
(43:52) As Marty watches
on, Pargiter's boat continues up the river (in reality, it has
taken a huge step back down the river!).
|
THEN...

|
Image © ITV Studios, 1969 |
|
|
...NOW
|
Status:
Recognisable (Altered) |
Access: Public |

|
Image © Craig Robins, 2018 |
|
|
|

"Pargiter's Heist"
(6A)
WATER TANK
ELSTREE STUDIOS
SHENLEY ROAD
BOREHAMWOOD
HERTFORDSHIRE WD6
(16:56) Lord Dorking spies
someone on the shore, close to the hole in the wall that the
robot is using to reach into the records store.
(19:51) Dorking passes the
old man on his way to find the robot.
(29:47) Jeff asks the old
man for information.
Since Filming: The
water tank behind Elstree Studios was in the main situated on part of the
site purchased from the studios by Tesco plc. The tank has been
filled in and the land remains otherwise undeveloped behind the
Tesco store.
Spotter's Note: The
sequences showing the hole in the wall were all filmed on an
interior studio set.
|
Also appeared in:
Used extensively in ITC productions and other television
and films produced at Elstree Studios. |
|
THEN...
|
Image © ITV Studios, 1969 |
|
|
THEN...
|
Image © ITV Studios, 1969 |
|
|
THEN...
|
Image © ITV Studios, 1969 |
|
|
|
|
...NOW
|
Status:
Redeveloped |
Access: Private |
|
Image / Map Data © Google, 2018 |
|
|
(6B)
STAGE 5 BUILDING
ELSTREE STUDIOS
SHENLEY ROAD
BOREHAMWOOD
HERTFORDSHIRE WD6
(19:01) The robot makes its
way back, clasping the stolen files in its
mechanical claw.
Since Filming: Stage 5 was
demolished when the part of the Elstree Studios site it stood on
was sold off to Tesco plc.
|
Also appeared in:
Used extensively in ITC productions and other television
and films produced at Elstree Studios. |
|
THEN...
|
Image © ITV Studios, 1969 |
|
|
THEN...
|
Image © ITV Studios, 1969 |
|
|
|
...Location as seen in 'The Ghost Talks'...
|
Image © ITV Studios, 1969 |
|
|
Spotter's Note: As
previously mentioned, the red line in the aerial view
demonstrates the approximate 'cut line' through the studio
buildings, with everything to the right of the line being
demolished to make way for the Tesco superstore. Stage 5 was demolished in its entirety. The orange
arrow denotes the approximate
filming site.
|
|
...NOW
|
Status:
Redeveloped |
Access: Public |
|
Image / Map Data © Google, 2018 |
|
|
(6C)
TIMBER STORE
ELSTREE STUDIOS
SHENLEY ROAD
BOREHAMWOOD
HERTFORDSHIRE WD6
(19:55) Dorking collects
the papers.
|
Also appeared in:
Used extensively in ITC productions and other television
and films produced at Elstree Studios. |
|
THEN...

|
Image © ITV Studios, 1969 |
|
|
...NOW
|
Status:
Recognisable |
Access: Private |

|
Image / Map Data © Google, 2018 |
|
|
|

"Jeff's Apartment Block"
HANOVER HOUSE
ST. JOHN'S WOOD HIGH STREET
ST. JOHN'S WOOD
LONDON NW8
|
Identified by:
Sam Denham |
(20:21) Establishing shot of
Jeff's apartment building (footage re-used from My Late Lamented Friend
and Partner).
|
Also appeared in:
Randall and Hopkirk (Deceased) -
used extensively throughout the series
The Champions - 'To Trap A Rat' |
|
THEN...

|
Image © ITV Studios, 1969 |
|
|
...NOW
|
Status: Recognisable |
Access: Public (Private House) |
|
Image © Craig Robins, 2018 |
|
|
|

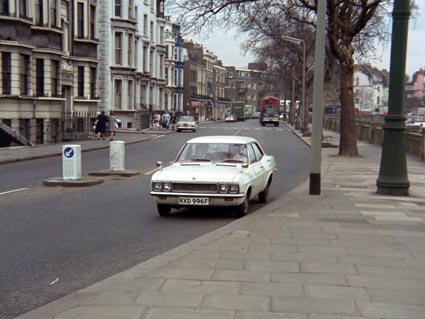
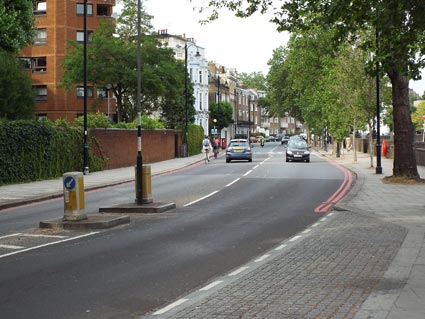
"Jeff and Marty on the Trail"
ANHALT ROAD
BATTERSEA
LONDON SW11
(28:35) Jeff waits in his
Vauxhall whilst Marty checks the National Records archive to see
what has been taken.
|
THEN...
|
Image © ITV Studios, 1969 |
|
|
...NOW
|
Status:
Redeveloped |
Access: Public (Houses Private) |
|
Image © Craig Robins, 2018 |
|
|
|

"Fire Crews to the Rescue"
(9A)
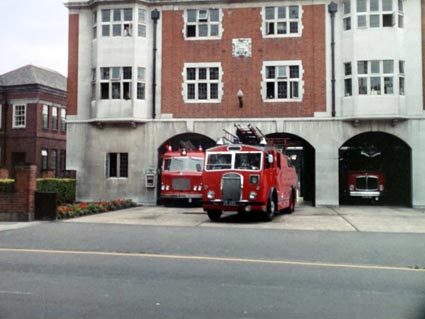
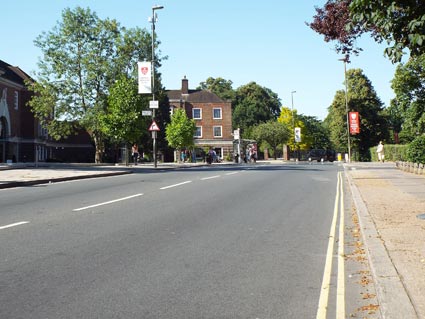
HENDON FIRE STATION
91 THE BURROUGHS
HENDON
LONDON NW4
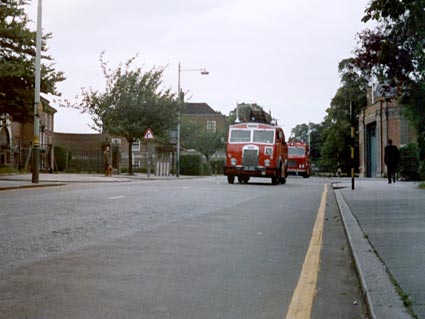
(39:47) Two fire engines
leave the station in response to Marty setting off the fire alarm
at Pargiter's warehouse.
|
THEN...
|
Image © ITV Studios, 1969 |
|
|
...NOW
|
Status:
Recognisable |
Access: Public |
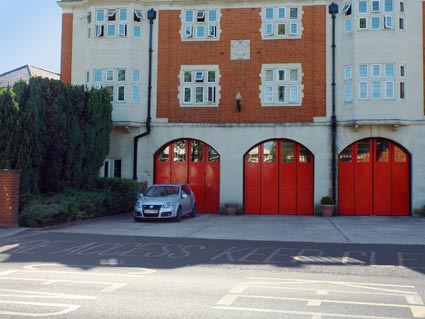
|
Image © Craig Robins, 2018 |
|
|
(39:53) The camera pans and
follows the fire engines as they turn right onto The Burroughs.
|
THEN...
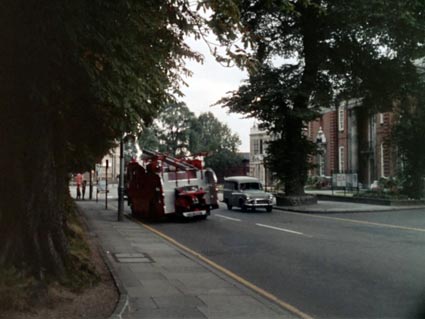
|
Image © ITV Studios, 1969 |
|
|
...NOW
|
Status:
Recognisable |
Access: Public |
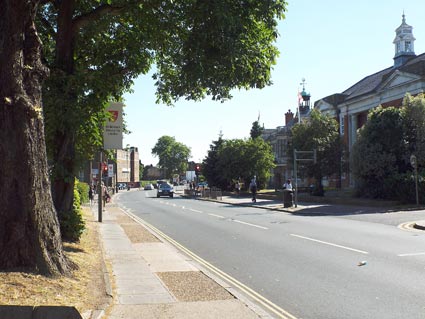
|
Image © Craig Robins, 2018 |
|
|
(39:56) The fire engines
speed past the camera.
|
THEN...
|
Image © ITV Studios, 1969 |
|
|
...NOW
|
Status:
Recognisable |
Access: Public |
|
Image © Craig Robins, 2018 |
|
|
|

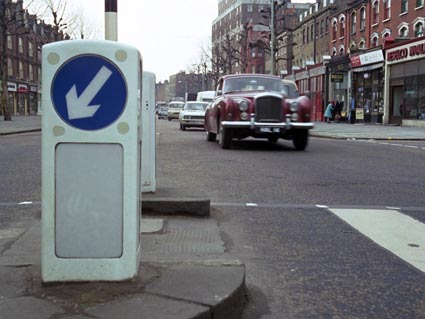
"Chase That Boat!"
(10A)
CHELSEA EMBANKMENT
CHELSEA
LONDON SW3
(43:09) Jeff and Marty try to
follow the boat from the road (near Old Church Street).
|
THEN...

|
Image © ITV Studios, 1969 |
|
|
...NOW
|
Status:
Recognisable |
Access: Public |

|
Image © Craig Robins, 2018 |
|
|
(43:11) The camera looks down
Chelsea Embankment as the Vauxhall drives on (still near Old
Church Street junction).
|
THEN...

|
Image © ITV Studios, 1969 |
|
|
...NOW
|
Status:
Recognisable |
Access: Public |

|
Image © Craig Robins, 2018 |
|
|
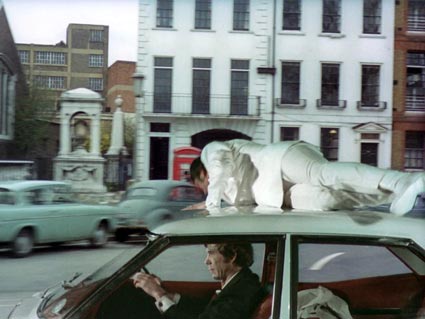
(43:26) With Marty perched on
top, the Vauxhall passes Albert Bridge.
|
THEN...
|
Image © ITV Studios, 1969 |
|
|
...NOW
|
Image © Craig Robins, 2018 |
|
|
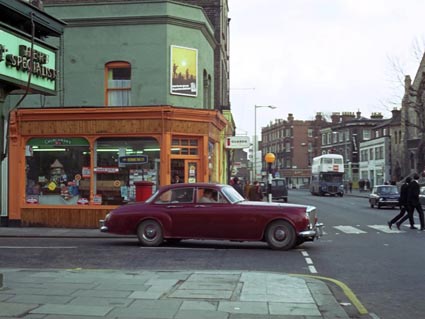
(10B)
VICTORIA EMBANKMENT
LONDON SW1
(43:57) The camera pans from
the boat on the river across to Victoria Embankment as Jeff and
Marty follow it in the Vauxhall.
|
THEN...

|
Image © ITV Studios, 1969 |
|
|
...NOW
|
Status:
Recognisable |
Access: Public |

|
Image © Craig Robins, 2018 |
|
|
(10C)
CHEYNE WALK
CHELSEA
LONDON SW10
(44:07) The Vauxhall
continues on.
|
Also appeared in:
Randall and Hopkirk (Deceased) -
'You Can Always Find a Fall Guy'
H.G. Wells' Invisible Man - 'Death Cell'
Man in a Suitcase - 'The Jigsaw Man' |
|
THEN...

|
Image © ITV Studios, 1969 |
|
|
...NOW
|
Status:
Recognisable |
Access: Public |

|
Image © Craig Robins, 2018 |
|
|
(10D)
CREMORNE ROAD
CHELSEA
LONDON SW10
(44:27) The shot opens with a
shot of Battersea Bridge from Cremorne Road....
|
Also appeared in:
Randall and Hopkirk (Deceased) -
'You Can Always Find a Fall Guy' |
|
THEN...
|
Image © ITV Studios, 1969 |
|
|
...NOW
|
Status:
Recognisable |
Access: Public |
|
Image © Craig Robins, 2018 |
|
|
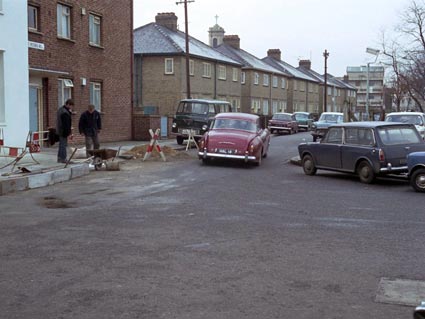
(44:30) Jeff and Marty lose
sight of the boat and pull up at the side of the road (Cremorne
Road, just beyond the junction with Blantyre Road).
(See
also 11A) |
THEN...
|
Image © ITV Studios, 1969 |
|
|
...NOW
|
Status:
Recognisable |
Access: Public |
|
Image © Craig Robins, 2018 |
|
|
|

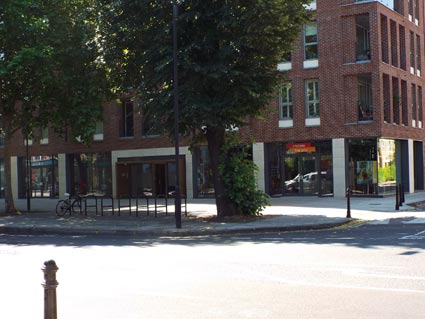
"Chase That Car!"
(11A)
CREMORNE ROAD
CHELSEA
LONDON SW10
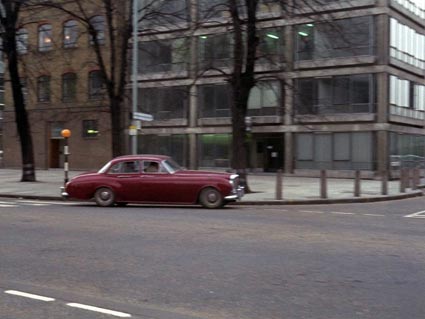
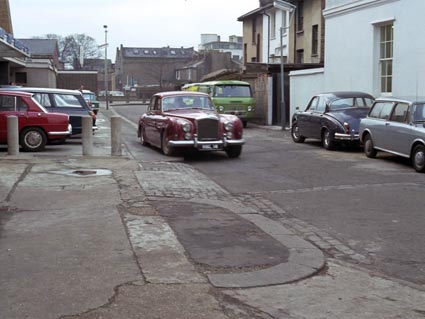
(44:43) Marty spots a red
Bentley car exiting from the pier entrance.
|
THEN...
|
Image © ITV Studios, 1969 |
|
|
...NOW
|
Status:
Recognisable |
Access: Public |
|
Image © Craig Robins, 2018 |
|
|
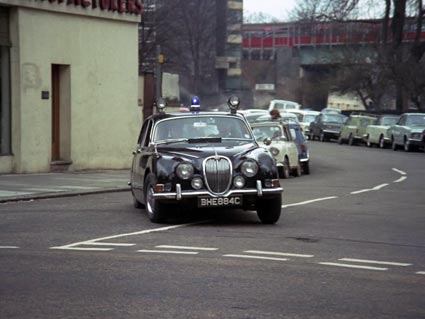
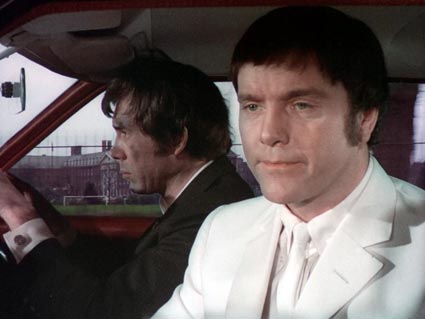
(42:52) The car swings out onto Cremorne Road.
(44:49) Marty reckons that
its registration number - HAL 14 - means that it could well be
Pargiter's.
(44:57) The Bentley passes
the junction with Lots Road as Marty and Jeff discuss whether it
is or isn't Pargiter's. |
THEN...
|
Image © ITV Studios, 1969 |
|
|
...NOW
|
Status:
Recognisable |
Access: Public |
|
Image © Craig Robins, 2018 |
|
|
(45:03) The Vauxhall sets off
down Cremorne Road in pursuit of the Bentley, turning right into
Dartrey Road.
|
THEN...
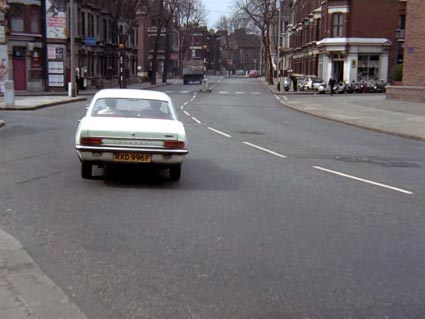
|
Image © ITV Studios, 1969 |
|
|
...NOW
|
Status:
Recognisable (Altered) |
Access: Public |
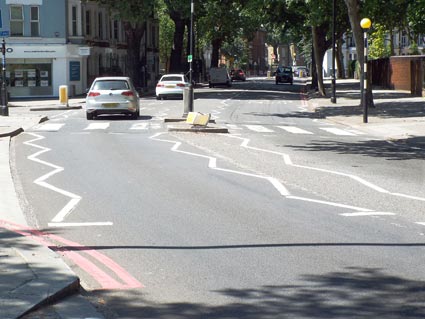
|
Image © Craig Robins, 2018 |
|
|
Since
Filming: Dartrey Road - the road that the Vauxhall
turns into - no longer exists, having been removed (along with five
others) in the construction of the World's End housing estate.
Demolition of the road was underway in 1969 and may already have
been happening when Jeff's car was filmed turning into it.
The
map to the right overlays the original streets over the current
map and the 'Now' photo shows the Blantyre Tower, which stands on
the original site of Dartrey Road, viewed from
Lots Road.
|
MAP COMPARISON...
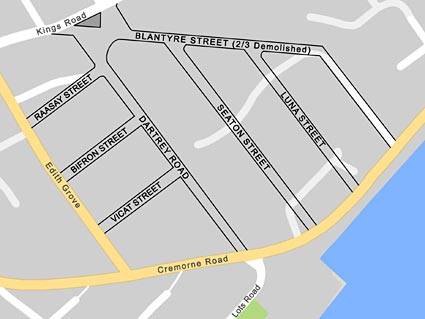
|
Image © Craig Robins, 2018 |
|
|
...NOW
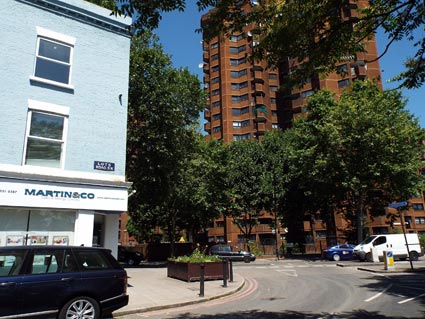
|
Image © Craig Robins, 2018 |
|
|
(11B)
RAVENSCOURT ROAD
(Junction with
KING STREET)
HAMMERSMITH
LONDON W6
(45:10) Pargiter's car pulls
out across the 'give way' markings....
|
THEN...
|
Image © ITV Studios, 1969 |
|
|
...NOW
|
Status:
Recognisable (Altered) |
Access: Public |
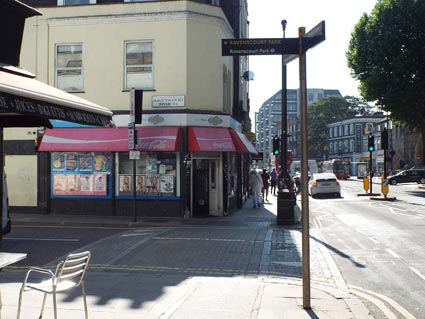
|
Image © Craig Robins, 2018 |
|
|
(11C)
KING STREET
HAMMERSMITH
LONDON W6
|
Identified by:
John Holburn, RAHDAS |
(43:13) ...and onto King Street.
|
THEN...
|
Image © ITV Studios, 1969 |
|
|
...NOW
|
Status:
Recognisable |
Access: Public |
|
Image © Craig Robins, 2018 |
|
|
(45:18) The rearward view
from the Bentley (at the junction of St Peter's Grove).
(46:33) The Vauxhall remains
on the Bentley's tail. |
THEN...
|
Image © ITV Studios, 1969 |
|
|
...NOW
|
Status:
Recognisable |
Access: Public |
|
Image © Craig Robins, 2018 |
|
|
(45:24) A wide angle shot of
King Street as the two cars approach (camera sited by the junction of
Beavor Lane).
|
THEN...
|
Image © ITV Studios, 1969 |
|
|
...NOW
|
Status:
Recognisable |
Access: Public |
|
Image © Craig Robins, 2018 |
|
|
(45:28) The camera pans as
the cars pass (looking towards the junction of Ravenscourt Park).
The camera then zooms to a Police car (see 11F).
|
THEN...
|
Image © ITV Studios, 1969 |
|
|
...NOW
|
Status:
Recognisable |
Access: Public |
|
Image © Craig Robins, 2018 |
|
|
(45:46) The cars drive over
the zebra crossing.
|
THEN...
|
Image © ITV Studios, 1969 |
|
|
...NOW
|
Status:
Recognisable |
Access: Public |
|
Image © Craig Robins, 2018 |
|
|
(45:51) The Bentley swerves
into Beavor Lane.
|
THEN...
|
Image © ITV Studios, 1969 |
|
|
...NOW
|
Status:
Recognisable |
Access: Public |
|
Image © Craig Robins, 2018 |
|
|
(45:58) Jeff follows the Bentley and turns into Beavor Lane.
(46:07) The Police car misses the turning, brakes hard,
reverses and finally turns down Beavor Lane. |
THEN...
|
Image © ITV Studios, 1969 |
|
|
...NOW
|
Status:
Recognisable (Altered) |
Access: Public |
|
Image © Craig Robins, 2018 |
|
|
(11D)
BEAVOR LANE
HAMMERSMITH
LONDON W6
|
Identified by:
John Holburn, RAHDAS |
(45:30) As the two cars drive
past at speed, the camera zooms in on a black Jaguar Police car
parked in Beavor Lane. It pulls out to pursue the vehicles, its
siren wailing.
|
THEN...
|
Image © ITV Studios, 1969 |
|
|
...NOW
|
Status:
Recognisable |
Access: Public |

|
Image © Craig Robins, 2018 |
|
|
(46:02) The Bentley turns
into another part of Beavor Lane, and turns directly into St
Peters Road.
(46:17) Jeff drives into
Beavor Lane heading for St Peters Road.
(46:22) Finally, the police
car drives down Beavor Lane and turns into St Peters Road. |
THEN...
|
Image © ITV Studios, 1969 |
|
|
...NOW
|
Status:
Recognisable (Altered) |
Access: Public |
|
Image © Craig Robins, 2018 |
|
|
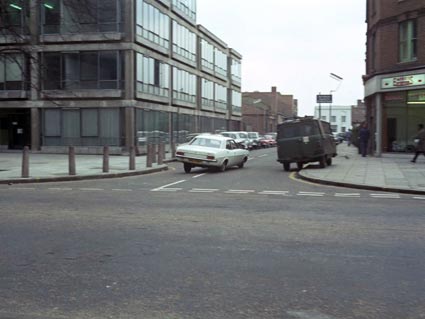
(11H)
ST PETERS ROAD
HAMMERSMITH
LONDON W6
(46:06) The Bentley heads
down St Peters Road, passing some workers at the roadside.
(46:20) Jeff just avoids hitting a parked car.
(46:25) The police car
almost hits the parked car. |
THEN...
|
Image © ITV Studios, 1969 |
|
|
...NOW
|
Status:
Recognisable |
Access: Public |
|
Image © Craig Robins, 2018 |
|
|
(11I)
ELSTREE STUDIOS
SHENLEY ROAD
BOREHAMWOOD
HERTFORDSHIRE WD6
(46:37) The Bentley speeds
in and nearly crashes into a lorry which reverses and
unintentionally blocks its path. Jeff and Marty arrive and
confront Pargiter and his Lords. The police arrive shortly
afterwards.
Since Filming: Of the buildings seen
in this sequence, only the Lumber Store does not survive today.
|
Also appeared in:
Used extensively in ITC productions and other television
and films produced at Elstree Studios. |
|
THEN...

|
Image © ITV Studios, 1969 |
|
|
THEN...

|
Image © ITV Studios, 1969 |
|
|
THEN...

|
Image © ITV Studios, 1969 |
|
|
...NOW
|
Status:
Recognisable (Altered) |
Access: Private |

|
Image / Map Data © Google, 2018 |
|
|
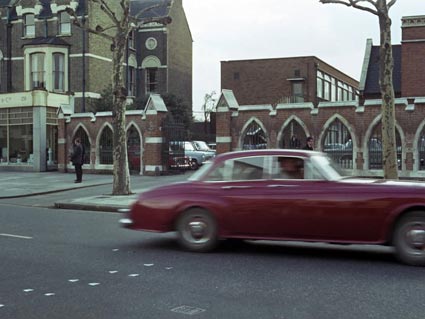
|

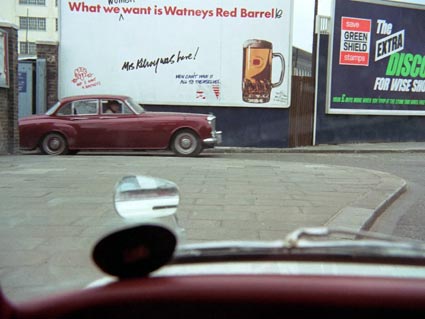
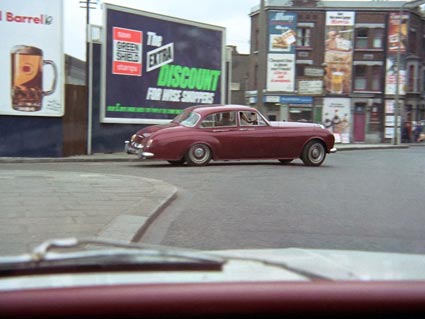
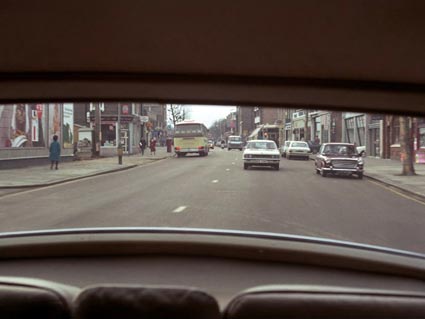
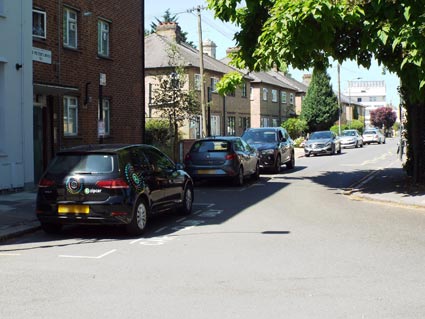
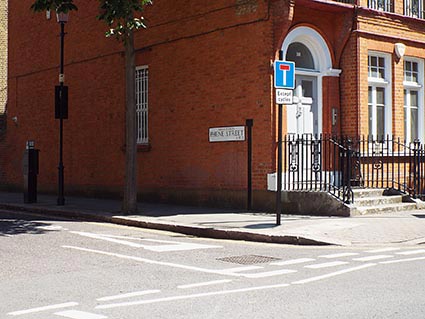
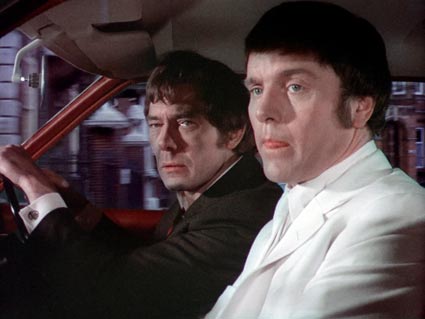
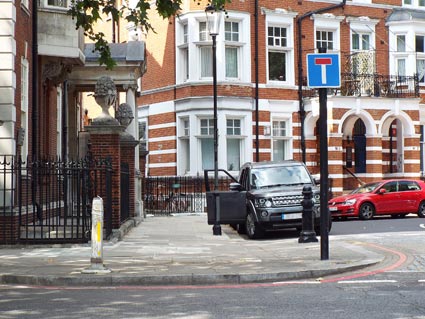
(A)
OAKLEY STREET
CHELSEA
LONDON sw3
|
Identified by:
Allen Dace, July 2018 |
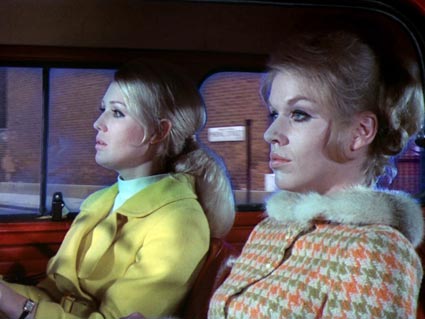
(08:54) Jeannie drives Anne
Soames to the Public Records Office, at first passing the
junction with Phene Street (heading north west). Marty appears
in the back seat and leans between them, unseen by either of the
women.
|
THEN...
|
Image © ITV Studios, 1969 |
|
|
...NOW
|
Image © Craig Robins, 2018 |
|
|
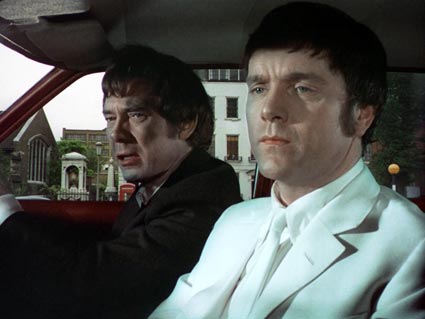
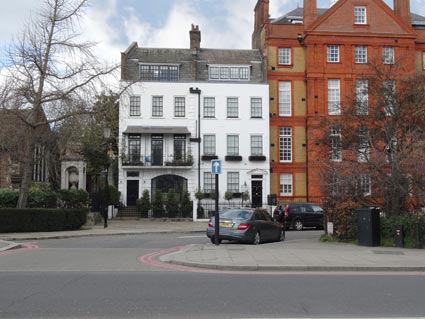
(09:14) Marty is suspicious of why Anne Soames wants to visit the
riverside annexe of the Public Records Office. |
THEN...
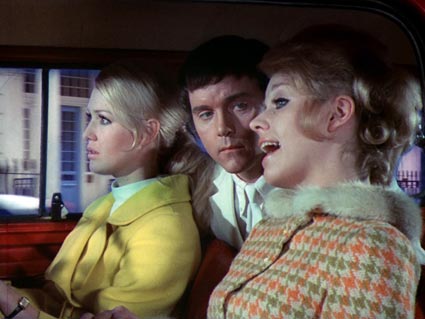
|
Image © ITV Studios, 1969 |
|
|
...NOW
|
Image © Craig Robins, 2018 |
|
|
(B)
SOUTH BANK from
CADOGAN PIER
CHELSEA EMBANKMENT
LONDON SW3
(10:10) Lords Dorking and
Surrey throw doubt on the success of Anne Soames' mission, much
to Pargiter's annoyance.
(16:52) While
Pargiter operates the remote controlled robot, Lords Dorking and
Surrey keep watch on the riverside.
|
THEN...

|
Image © ITV Studios, 1969 |
|
|
...NOW
|
Image © Craig Robins, 2018 |
|
|
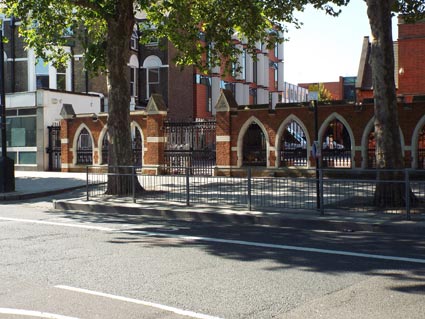
(C)
PALACE OF WESTMINSTER
LONDON SW1A
(filmed from
ALBERT EMBANKMENT
LAMBETH
LONDON SE1)
(11:43) Jeff talks Natasha
into having tea.
(15:22) Marty appears on the
riverside, looking for Jeff. Seeing no sign of him, Marty
disappears.
Spotter's Note: The
bridge wall seen in the original shot was a studio prop in front
of an optically printed view taken from the bank of the Thames.
|
THEN...
|
Image © ITV Studios, 1969 |
|
|
...NOW
|
Image © Craig Robins, 2018 |
|
|
(D)
RIVER THAMES and
ALBERT BRIDGE from
CHELSEA EMBANKMENT
LONDON SW3
(40:09) Marty's appears on
Pargiter's boat as it clears Albert Bridge.
|
THEN...
|
Image © ITV Studios, 1969 |
|
|
...NOW

|
Image © Craig Robins, 2018 |
|
|
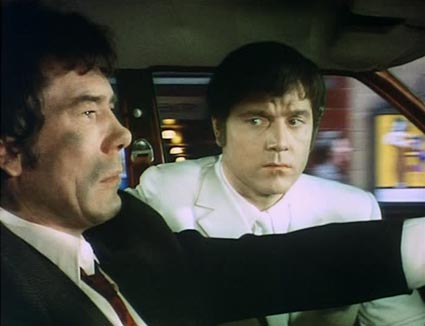
(E)
UNKNOWN ROAD (19a)
(28:38) Marty appears in the
passenger seat and the pair discuss his findings.
|
THEN...
|
Image © ITV Studios, 1969 |
|
|
(F)
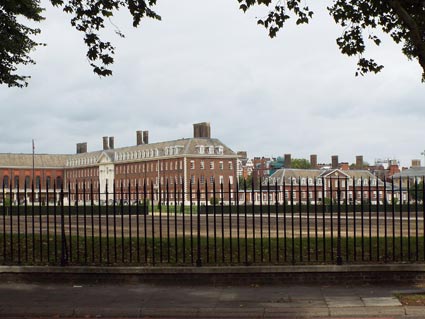
CHELSEA EMBANKMENT
CHELSEA
LONDON SW3
(43:15) The Vauxhall passes
the Royal Hospital Chelsea.
|
THEN...
|
Image © ITV Studios, 1969 |
|
|
...NOW
|
Image © Craig Robins, 2018 |
|
|
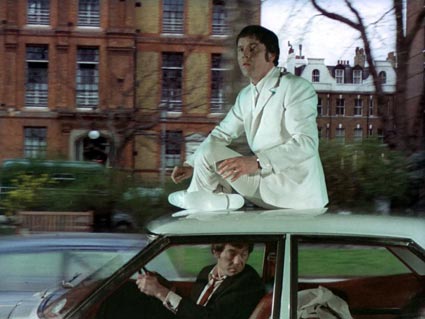
(43:24) Marty materialises on
top of the Vauxhall, hoping to gain a better view of the river.
|
THEN...

|
Image © ITV Studios, 1969 |
|
|
...NOW

|
Image © Craig Robins, 2018 |
|
|
(43:22) The car continues
down Chelsea Embankment, passing Lawrence Street.
|
THEN...
|
Image © ITV Studios, 1969 |
|
|
...NOW
|
Image © Craig Robins, 2018 |
|
|
(43:39) Marty leans over to
speak to Jeff as the Vauxhall passes the junction with Cheyne
Walk, which runs parallel with Chelsea Embankment.
|
THEN...
|
Image © ITV Studios, 1969 |
|
|
...NOW
|
Image © Craig Robins, 2018 |
|
|
(43:41) Marty rematerialises
in the car next to Jeff as the car passes Embankment Gardens.
|
THEN...
|
Image © ITV Studios, 1969 |
|
|
...NOW
|
Image © Craig Robins, 2018 |
|
|
(44:35) Jeff and Marty wonder
what to do now they have lost the boat.
(44:46) Marty spots a car
with the registration HAL 14, which he thinks is likely to be
Pargiter's.
(44:51) Marty tells Jeff to
get after the other car.
(44:59) Jeff starts the car. |
THEN...
|
Image © ITV Studios, 1969 |
|
|
...NOW
|
Image © Craig Robins, 2018 |
|
|
(G)
GOODGE STREET
(Junction of WHITFIELD STREET)
FITZROVIA
LONDON W1
|
Identified by:
Craig Robins, July 2018 |
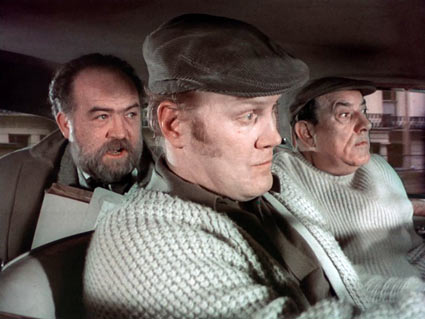
(45:16) Seated in the back
seat of the Bentley, Pargiter turns to look out of the rear
windscreen. They are being followed!
(46:31) Pargiter checks the
rear and announces that ther are still being pursued. |
THEN...
|
Image © ITV Studios, 1969 |
|
|
...NOW
|
Image © Craig Robins, 2018 |
|
|
(H)
SUSSEX GARDENS /
WESTBOURNE TERRACE
PADDINGTON
LONDON W2
|
Identified by:
Alan Hayes, October 2018
Anthony McKay (Backplate) |
(45:20) Pargiter tells
Dorking and Surrey that they are definitely being followed. They
must go faster. They pass St. James' Church and drive onto
Westbourne Terrace. (Backplate no
31019/31020)
(45:48) Pargiter declares
that they must take evasive action. |
THEN...
|
Image © ITV Studios, 1969 |
|
|
...BACKPLATE...
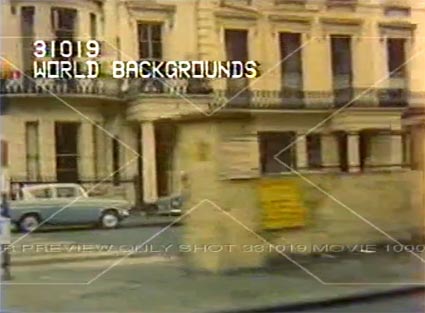
|
Image © World Backgrounds / Chumblin Media, 1969 |
|
|
...NOW
|
Image / Map Data © Google, 2018 |
|
|
(I)
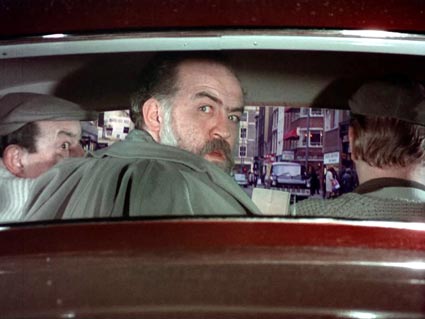
TOTTENHAM COURT ROAD
BLOOMSBURY
LONDON W1T
|
Identified by:
Anthony McKay |
(45:34) As they pass Goodge
Street Station, Marty notes the police are on their tail.
(45:54) They pass Holland Street
junction.
(46:01) They just make the corner.
|
Also appeared in:
Randall and Hopkirk (Deceased) - 'All Work and No
Pay', 'Never Trust A
Ghost', and 'Could You Recognise the Man Again?'
Gideon's Way - 'The Thin Red Line'
Man in a Suitcase
- 'Variation on a Million Bucks, Part 1' and 'Web with Four
Spiders'
Department S - 'Blackout' and 'The Perfect
Operation'
Strange Report - 'Report 2641 - Hostage: If You
Won't Learn, Die!' |
|
THEN...
|
Image © ITV Studios, 1969 |
|
|
|
Certain information reprinted with
permission from the excellent
A Guide
to Avengerland website.
Our grateful thanks to Anthony McKay for his kind
co-operation and many years' work in location hunting.
We are also indebted to the
researches of Vanessa Bergman and members of RAHDAS,
the former Randall and Hopkirk (Deceased) Appreciation Society.
|
Section compiled by: John Holburn, Anthony McKay,
Alan Hayes, Craig Robins and Vince Cox
Blu-ray grabs by: Geoff Dodd and Craig Robins
Official Photographer: Craig Robins (images ©)
Other photos: © as credited
'Also appeared in' and certain location information: Anthony McKay
With thanks to Paul Welsh
Back to Locations Index •
Forward to
Could You Recognise the Man Again?
Programme Guide: Just for the Record
|
